How to Boil Corn on the Cob
Mastering the Art of Boiling Corn on the Cob: A Culinary Adventure
How to Boil Corn on the cob- Simple Steps
How to boil Corn on the cob, a quintessential summer treat, brings with it the promise of sweet and succulent kernels bursting with flavor. Whether you’re a seasoned chef or a kitchen novice, boiling corn on the cob is a culinary skill worth mastering. In this guide, we’ll delve into the art of achieving the perfect boil for corn, exploring not only the precise timing required but also the science behind ensuring that each bite is a burst of sweetness. So, tie on your apron, and let’s embark on a culinary adventure!
The Science Behind Boiling Corn:
Before we dive into the nitty-gritty of boiling corn on the cob, let’s briefly touch upon the science that makes this process a delicate balance of time and temperature. Corn kernels contain starch, and as they are heated, the starch undergoes a transformation, turning into a luscious, creamy consistency. The key is not to overcook the corn, as this can result in a mushy texture, diminishing the overall dining experience.
Step 1: Selecting the Perfect Corn:
Begin your corn-boiling journey by selecting the freshest corn available. Look for husks that are vibrant green and tightly wrapped around the ear. The silk at the top should be slightly sticky, an indication of freshness. To enhance the sweetness of your corn, choose ears with plump, evenly spaced kernels.
Step 2: Husking and Cleaning:
Start by removing the husk and silk from the corn. Gently peel back the husk, taking care not to damage the kernels. Once the husk is removed, use a soft brush or your hands to clean off any remaining silk. This step is crucial for achieving a clean boil and preventing any unwanted debris in your final dish.
Step 3: Boiling Water and Adding Salt:
Fill a large pot with enough water to fully submerge the corn. Bring the water to a rolling boil and add a generous amount of salt. Salt not only enhances the flavor of the corn but also helps to maintain its vibrant color. As a transition, this sets the stage for the corn to absorb the seasoned water, creating a delicious foundation.
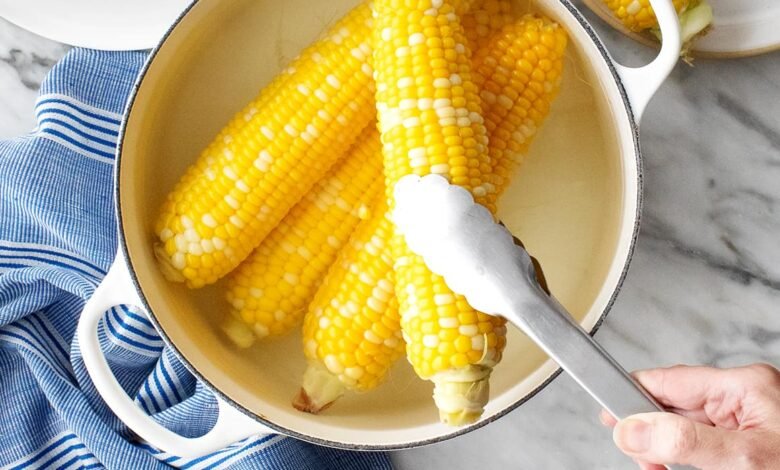
Step 4: Immerse and Cook:
Carefully place the husked corn into the boiling water. Remember, a gradual entry ensures even cooking. As the corn submerges, the water’s heat activates the natural sugars, creating that delightful sweetness we associate with perfectly boiled corn. Keep the water at a steady boil throughout the cooking process.
Transitioning into the cooking phase, it’s essential to monitor the corn closely. The active boiling water envelops the corn, coaxing out its flavors and maintaining a tender yet crisp texture. This stage is where precision becomes paramount.
Step 5: Timing Is Everything:
Now comes the critical question: How long to boil corn on the cob? The ideal time typically ranges between 8 to 10 minutes. However, this can vary based on factors such as the size of the corn and your desired level of tenderness.
Transitioning between the initial and final stages of cooking, it’s advisable to start testing for doneness around the 8-minute mark. A fork or knife should easily pierce a kernel, and the corn should exhibit a vibrant hue. As you experiment with boiling times, you’ll find the perfect balance that suits your palate.
Step 6: Quick Cool Down:
Once the corn reaches the desired doneness, promptly remove it from the boiling water and transfer it to a bowl of ice water. This quick cooldown not only halts the cooking process but also helps retain the corn’s vibrant color and crisp texture. It’s a crucial step in ensuring that each bite is a delightful blend of sweetness and crunch.
Transitioning into the cooling phase, this step serves as a buffer between the intense heat of the boiling water and the refreshing coolness that awaits your taste buds. It’s a transformative moment in the corn-boiling process.
Step 7: Butter and Seasoning:
The final touch to elevate your boiled corn on the cob to a culinary masterpiece is the addition of butter and seasoning. As the transition from cooking to serving unfolds, melt a generous amount of butter and drizzle it over the corn. Sprinkle with salt, pepper, or your favorite seasoning to add layers of flavor that complement the natural sweetness of the corn.
Conclusion:
Congratulations! You’ve now mastered the art of boiling corn on the cob, turning a humble ear of corn into a culinary delight. From the careful selection of fresh corn to the precise timing and seasoning, each step contributes to the symphony of flavors that define the perfect corn on the cob. As you continue to experiment with boiling times and seasonings, you’ll discover a personalized approach that suits your taste buds. So, the next time you embark on a culinary adventure, armed with your newfound knowledge, savor the sweet success of perfectly boiled corn on the cob.